AI setup
Your own private AI in 7 steps.
Use Hermes Desktop and Venice to bring in your Telegram chats — safely.
Follow the steps below to set up your private AI. Click any screenshot to view it at full size.
Create a Venice API key
Use a Venice private model, or run a local LLM on your own Mac. If you run a local LLM, you don't need a Venice API key.
Using a local LLM? Skip the Venice key, continue to step 2, then use the local instructions in steps 3 and 5.Venice requires an available API balance. If you need to buy credits, buy them on Venice, not Hermes. If Test fails, check your Venice API balance, key expiry, and spend limits. Venice API help
Create a key for private models
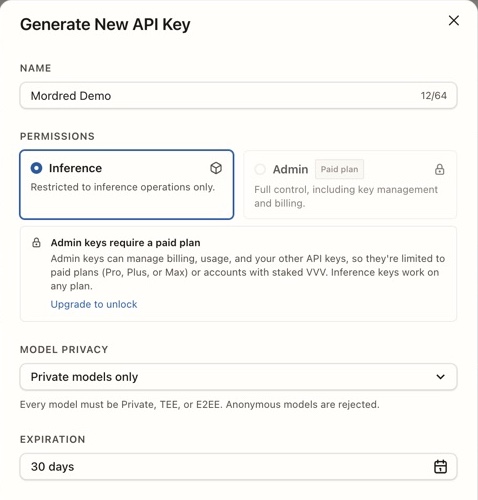
Open full size- Sign in to Venice, open API settings, and click New API Key.
- Enter a name, keep Inference selected, and set Model privacy to Private models only.
- This demo uses Mordred Demo as the name and 30 days for Expiration. Choose an expiration that fits your use.
- Review expiration and spend limits below, then click Generate key. Copy the key when it appears and keep it for step 3, when you connect Venice to Hermes.
Install Hermes Desktop
Download the Mac app
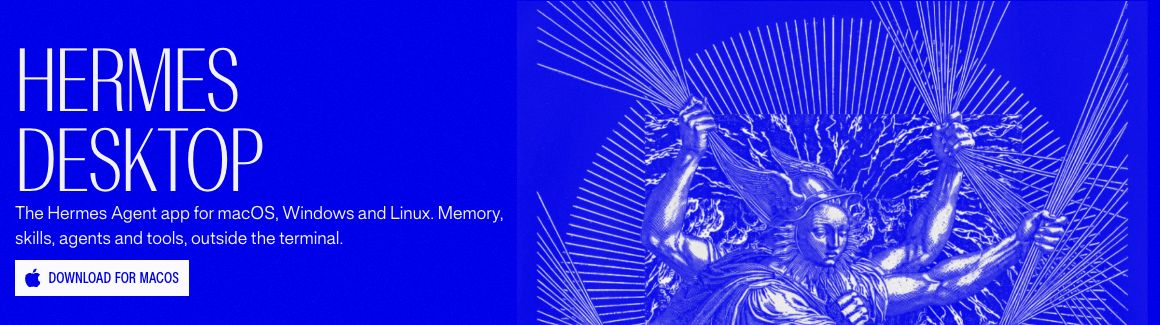
Open full size- On the official site, choose Download for macOS and open the downloaded installer.
- Follow the installer, then open Hermes Desktop.
Select “I'll choose a provider later”
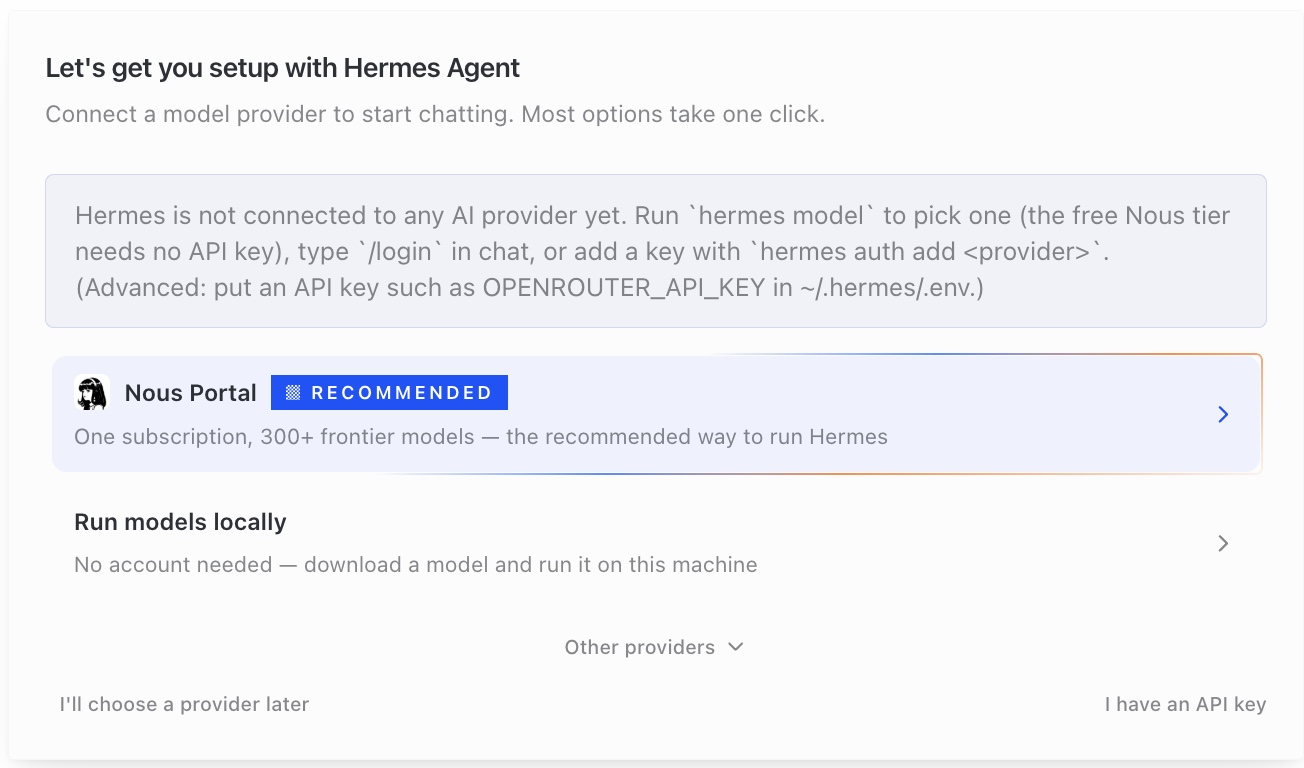
Open full size- When Hermes asks you to connect a model provider, click I'll choose a provider later in the lower-left corner.
- You'll connect Venice in step 3.
Linux / Ubuntu troubleshooting
Fixes verified on a fresh Ubuntu 24.04 installation. Open the error that matches your screen; package names may differ on other Linux distributions.
“Building or probing the TPM helper failed”
This can mean Rust or TPM development libraries are missing, or your desktop session cannot access the TPM. Linux KeyVault needs a working TPM 2.0 device; there is no software-key fallback.
Install the native build dependencies.
sudo apt-get updatesudo apt-get install -y build-essential pkg-config libtss2-dev clang libclang-devInstall Rust from the official rustup installer. The helper requires Rust 1.85 or newer; Ubuntu 24.04's unversioned Rust packages may be too old. If a suitable toolchain is already installed, just load its environment and check the versions.
curl --proto '=https' --tlsv1.2 -sSf https://sh.rustup.rs -o /tmp/mordred-rustup-init.shsh /tmp/mordred-rustup-init.sh -y --profile minimal. "$HOME/.cargo/env"rustc --versioncargo --versionCheck the device and your groups. If /dev/tpmrm0 does not exist, check your machine or VM's TPM support first; installing libraries cannot create a TPM.
ls -l /dev/tpmrm0idOnly if the device belongs to group tss and your user is not a member, add your user to that group. Do not make the device world-writable.
sudo usermod -aG tss "$(id -un)"Sign out of the Linux desktop session and sign back in. Reconnecting a VNC viewer alone is not enough: existing processes retain their old groups. In a new terminal, check device access and build the helper.
. "$HOME/.cargo/env"test -r /dev/tpmrm0 && test -w /dev/tpmrm0 && echo 'TPM device access OK'hermes-mordred keyvault enable-tpmAfter the hardware probe succeeds, open Desktop from the same terminal so it inherits the Rust environment.
hermes desktop --skip-build
Check it worked
The command reports “TPM 2.0 helper installed and hardware probe succeeded.” The Mordred page then shows “✓ TPM 2.0”. Memory encryption and Telegram login are separate setup steps.
Desktop build fails in node-gyp: missing make
A minimal Ubuntu installation may not include the native build tools needed for Hermes Desktop.
Install the tools and rebuild. The first build can take several minutes; leave the terminal open.
sudo apt-get install -y build-essential pkg-confighermes desktop --build-onlyOnce packaging finishes, launch Desktop.
hermes desktop --skip-build
Check it worked
The build completes and the Hermes Desktop window opens. If the build is killed or becomes very slow, check available memory and VM CPU capacity before retrying.
Desktop cannot start: libasound.so.2 is missing
The packaged Desktop application needs the ALSA runtime library even on a machine without speakers.
On Ubuntu 24.04, install libasound2t64, then start the already-built application.
sudo apt-get install -y libasound2t64hermes desktop --skip-build
Check it worked
The missing-library error disappears and Desktop reaches its main screen.
The Hermes installer asks for a sudo password while checking libatomic.so.1
The installer needs libatomic1. Some EC2 Ubuntu accounts use SSH keys and have no login password, even when sudo commands are allowed without one.
Install the missing library from a terminal, then re-run the Hermes installer. If sudo genuinely requires authentication, use your Linux account password or ask the machine's administrator; do not enter your API key or VNC password.
sudo apt-get install -y libatomic1
Check it worked
The installer proceeds past the Node.js library check.
Nous Portal is waiting for approval, but I only want to open Desktop
This is provider onboarding, not an installation failure. You can open Desktop before connecting a model provider.
Press Ctrl+C to leave the login wait. If interactive setup continues, exit that setup too and let the installer finish. Once Hermes is installed, run hermes desktop. On Desktop's provider screen, choose “I'll choose a provider later”.
Check it worked
Desktop reaches its main screen. Chat requests still need a model provider configured later.
Telegram login: “Enter the phone number in international format”
Telegram expects a country code and a phone number, not the local dialing format. This applies on every supported platform.
Enter your api_id, api_hash, and phone number from your Telegram API settings. For a Japanese number such as 090-1234-5678, use +819012345678. Click “Send login code”, then enter the code received in your Telegram app; the phone number does not belong in the code field.
Check it worked
The form advances to the login-code step. This alone does not mean login is complete; finish Telegram's authentication prompts.
Connect your AI to Hermes
Using a local LLM instead of Venice
Run a downloaded, tool-capable model in Ollama on this Mac and keep the server running. Choose a local model, not a cloud model.
In Settings → Providers → Custom Endpoints, use Name: Local LLM, Provider ID: local-llm, Endpoint URL: http://127.0.0.1:11434/v1, API Mode: Auto-detect, API Key: ollama (a placeholder), and Default Model: the exact downloaded model name.
Click Test, then Save. Select this provider and model in Settings → Model → Main model, click Apply, and open a new chat. Skip the Venice examples below and continue to step 4.
Ollama local server setupOpen Settings from the top-right corner
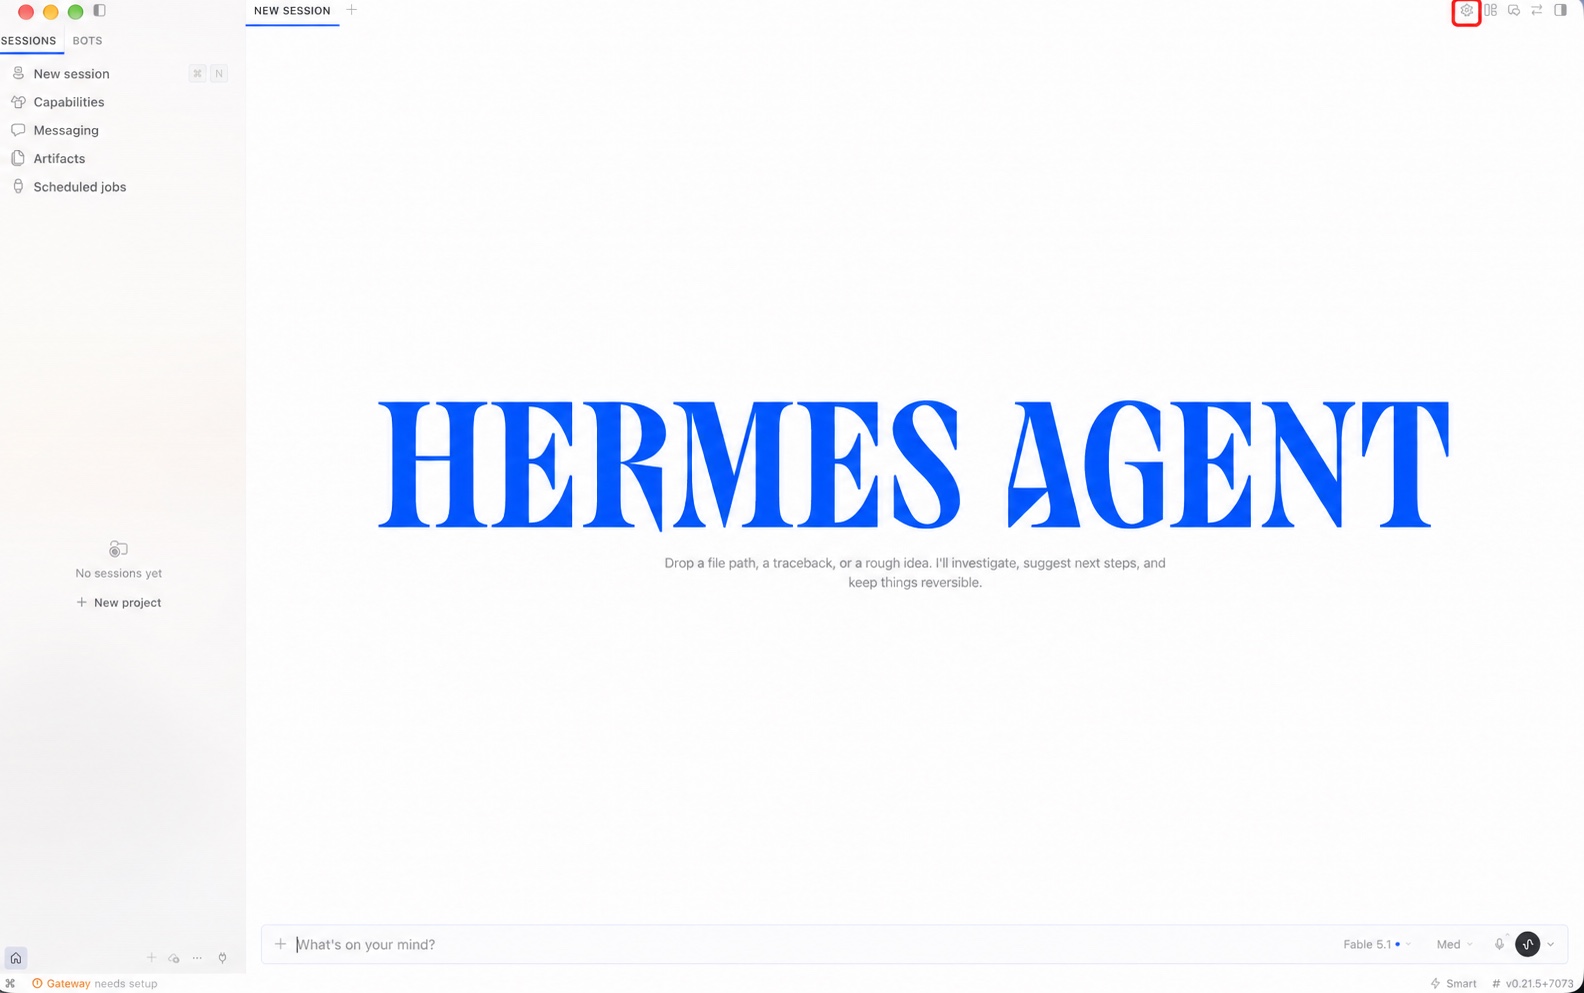
Open full size- Click the gear button outlined in red in the top-right corner to open Settings.
 Settings Providers Custom Endpoints
Open Settings → Providers → Custom Endpoints
Open full size- In Settings, open Providers in the left sidebar, then select Custom Endpoints.
- The screenshot shows an empty Add Endpoint form. Enter the Venice endpoint URL listed below and paste your own API key. Click Test to check the connection, then click Save once the test succeeds.
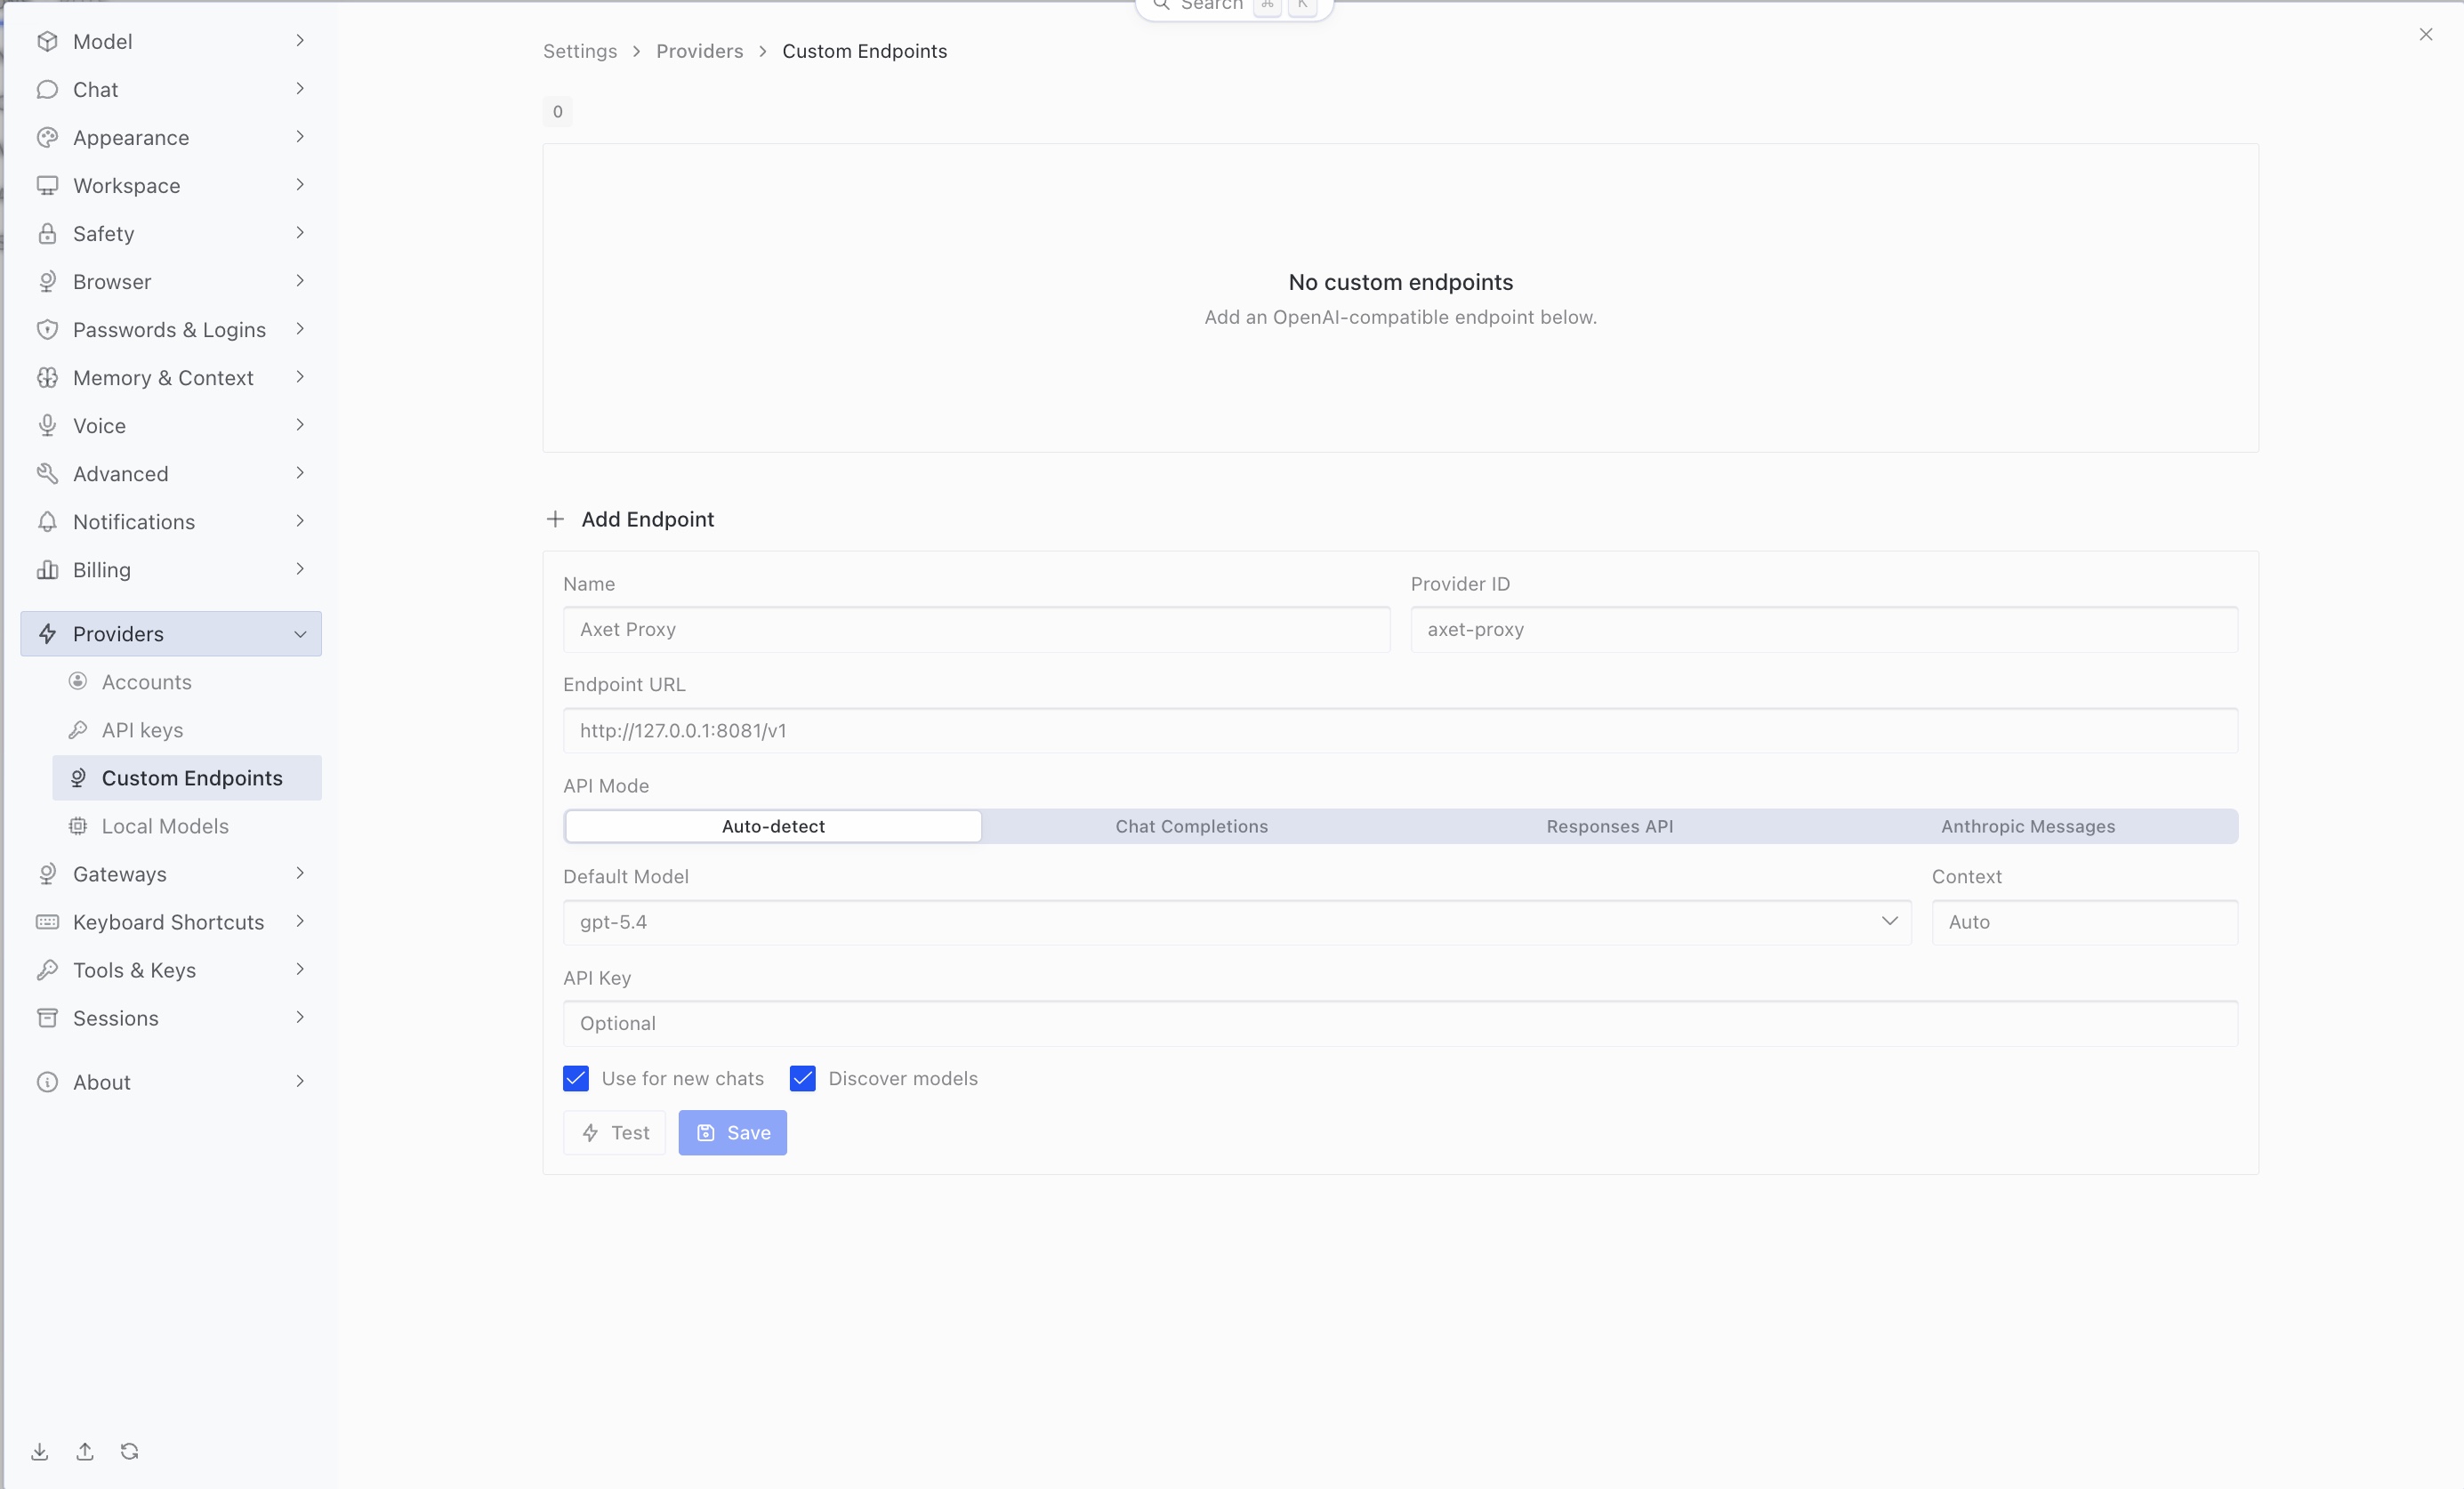
- Name
- Example: Mordred Demo — choose a name you recognize.
- Provider ID
- Example: mordred-demo — choose an ID for this connection.
- Endpoint URL
- https://api.venice.ai/api/v1
- API Mode
- Auto-detect
- API Key
- Paste the API key you created in Venice in step 1.
- Default Model
- Optional — you can leave this blank and select an e2ee- model in Settings → Model → Main model later.
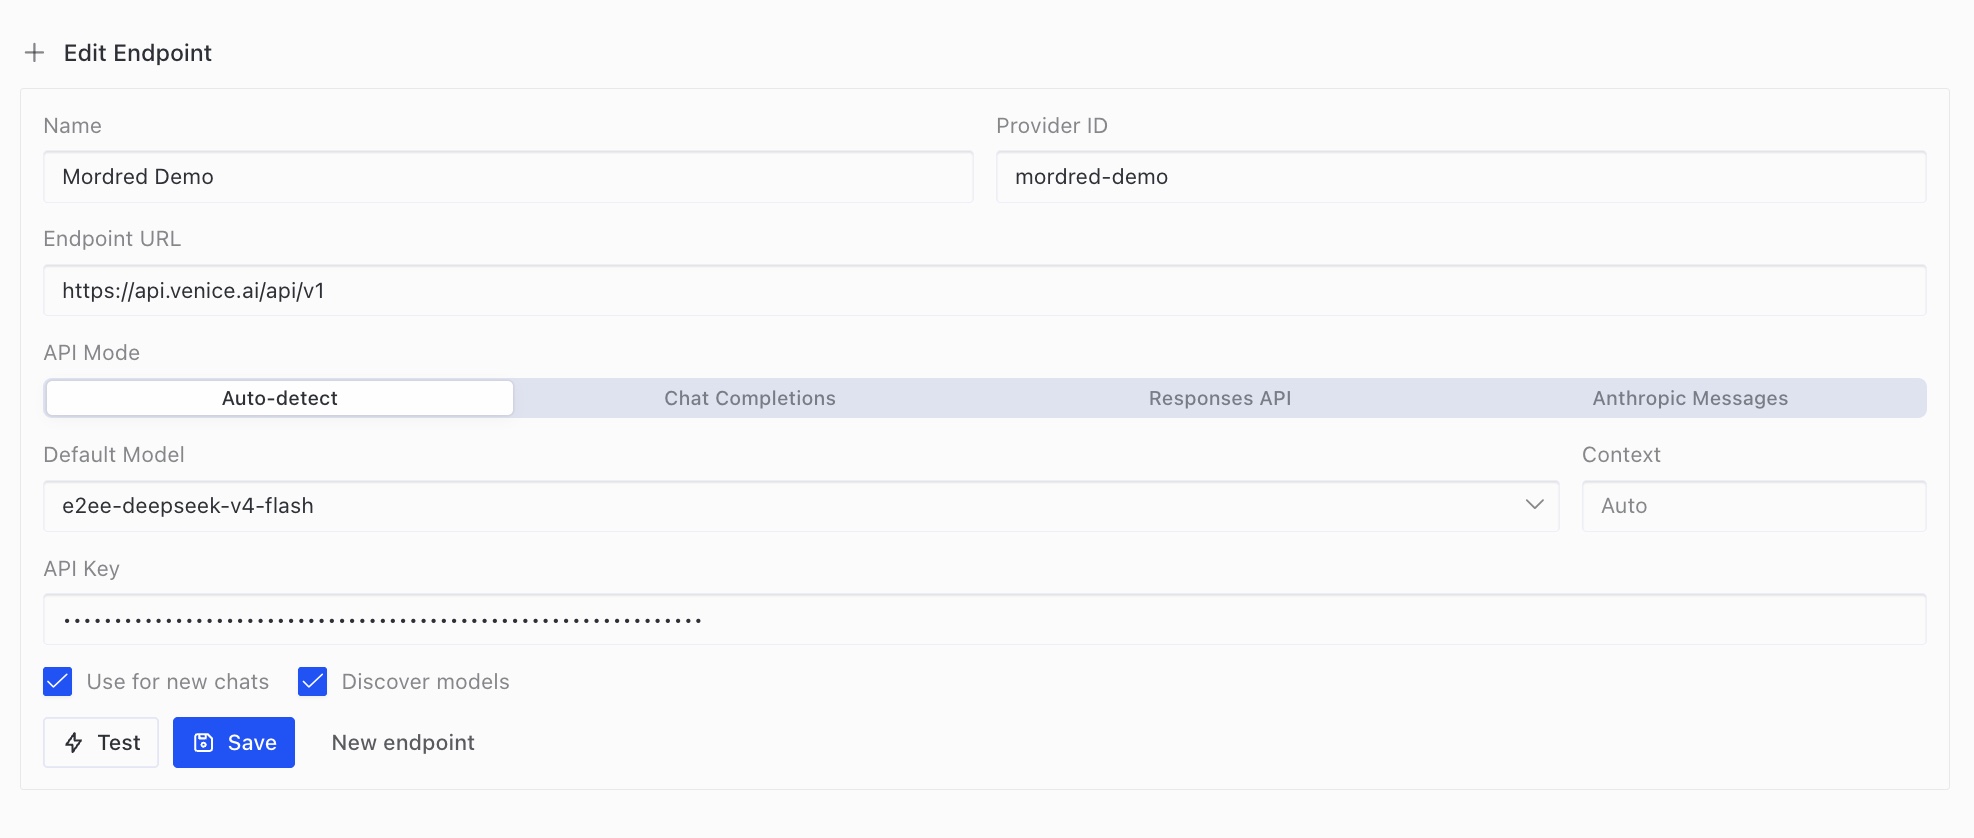
Enter your Venice connection details
Open full size- Mordred Demo and mordred-demo are examples for Name and Provider ID. You can choose your own values.
- Set API Mode to Auto-detect. Default Model is optional: you can leave it blank even though this example shows a model.
- In API Key, paste the API key you created in Venice in step 1. The screenshot shows the key masked.
- Click Test to check that the connection works. Once the test succeeds, click Save to save the endpoint.
Select your chat model
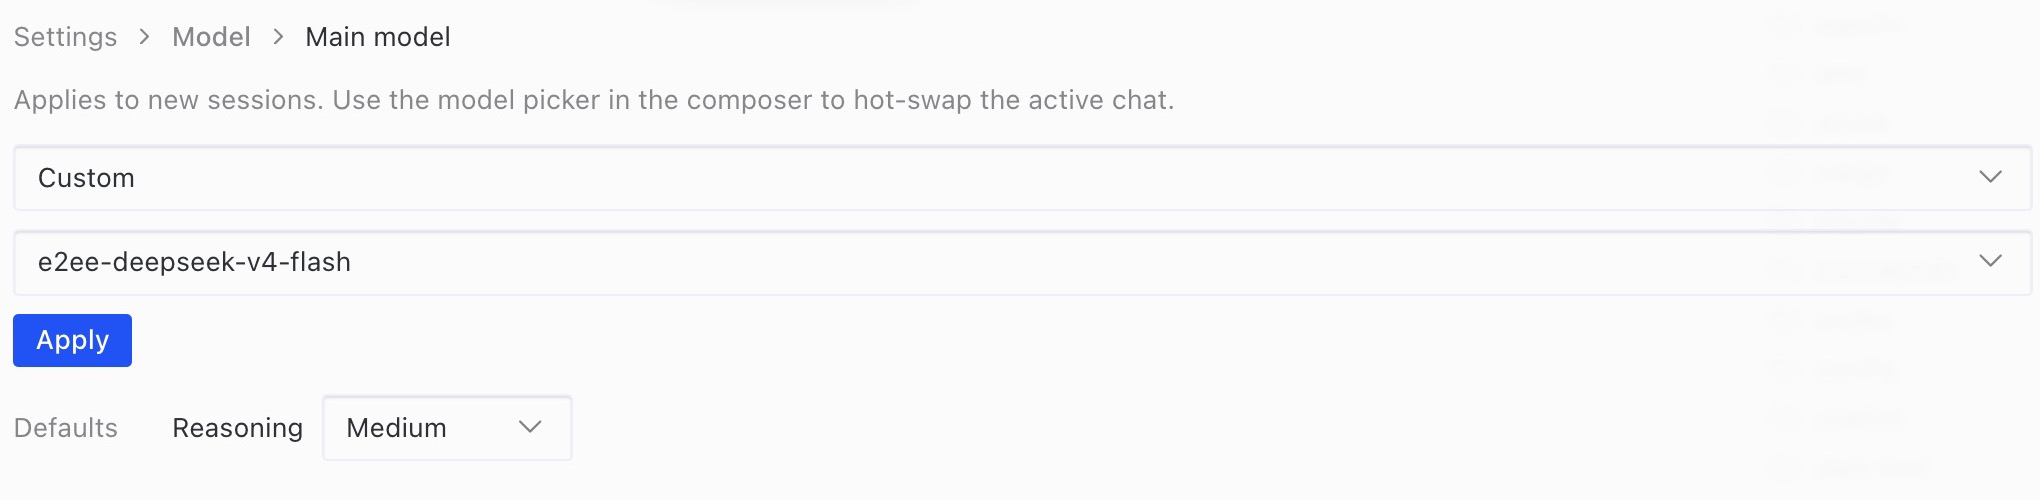
Open full size- Open Settings → Model → Main model. Choose your custom provider and an available model beginning with e2ee-, then click Apply.
- The screenshot shows one example model. Start a new chat to use the selected default.
Ask Hermes chat to install Mordred
What gets installed, and why does Hermes ask for permission?
Mordred is an add-on that gives Hermes privacy protection features. The instruction below asks Hermes to download and install Mordred and the software it needs, including support for importing Telegram chats, on your Mac.
Hermes may ask for your permission because it needs to install software on your Mac. If a permission request appears, check that it is for the Mordred installation command you just sent, then approve it to continue.
Installing Mordred does not turn on encryption or import your Telegram chats. You will set up encryption in step 5, then connect Telegram and choose what to import in step 6.
Install hermes-mordred with Telegram support by running: curl -fsSL https://raw.githubusercontent.com/mordredagent/hermes-mordred/main/scripts/install.sh | bash -s -- --with-telegramWhen the chat finishes, “Mordred” appears in the left sidebar Then quit and reopen Hermes DesktopWait for Mordred to appear, then restart Hermes
Open full size- Paste the prompt above into a Hermes chat and follow the installation instructions.
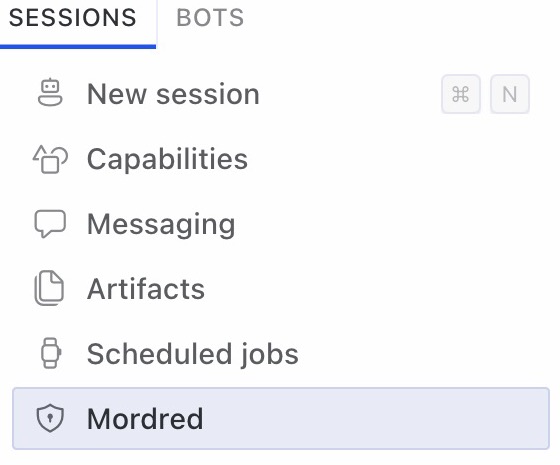
- Wait for the chat in the session where you pasted the prompt to finish. Mordred will appear in the left sidebar.
- After Mordred appears, restart Hermes Desktop by fully quitting the app (⌘Q) and opening it again. Clicking the red close button in the top-left corner only closes the window; it does not quit the app.
- After reopening Hermes Desktop, click Mordred in the left sidebar to continue.
- To remove Mordred later, use Uninstall Mordred… on the same page.
Follow the screen to encrypt
- Prepare the Secure Enclave
- Turn on memory encryption Touch ID
The passphrase is shown only once
Write it down the moment it appears.
You will need this passphrase to restore your encrypted Hermes memories and secrets stored in the vault, such as API keys, on another Mac when you migrate. Without it, you cannot restore that data on the new Mac, even if you have a backup.
Recovery also requires a backup of the encrypted vault and memory files. The passphrase alone cannot restore missing files.
Save the passphrase, check “I have written it down”, and click Continue. Then quit Hermes with ⌘Q and reopen it before setting the question model. Closing the window is not enough.
- Question model Use Hermes' Venice key
For a local LLM, enter the same local endpoint and model name under Question model, then click Use local model.
Back up or move to another Mac
Quit Hermes and copy the entire ~/.hermes/mordred/vault and ~/.hermes/memories folders to your backup drive. Also copy ~/.hermes/mordred/telegram to keep imported messages. Store the passphrase separately.
Restore the vault on another MacCheck that the protection steps are complete
Open full size- Complete the Secure Enclave, memory encryption, and question model steps in order.
- This is an already configured example: each completed step has a checkmark. Your first-time setup will show the setup controls instead.
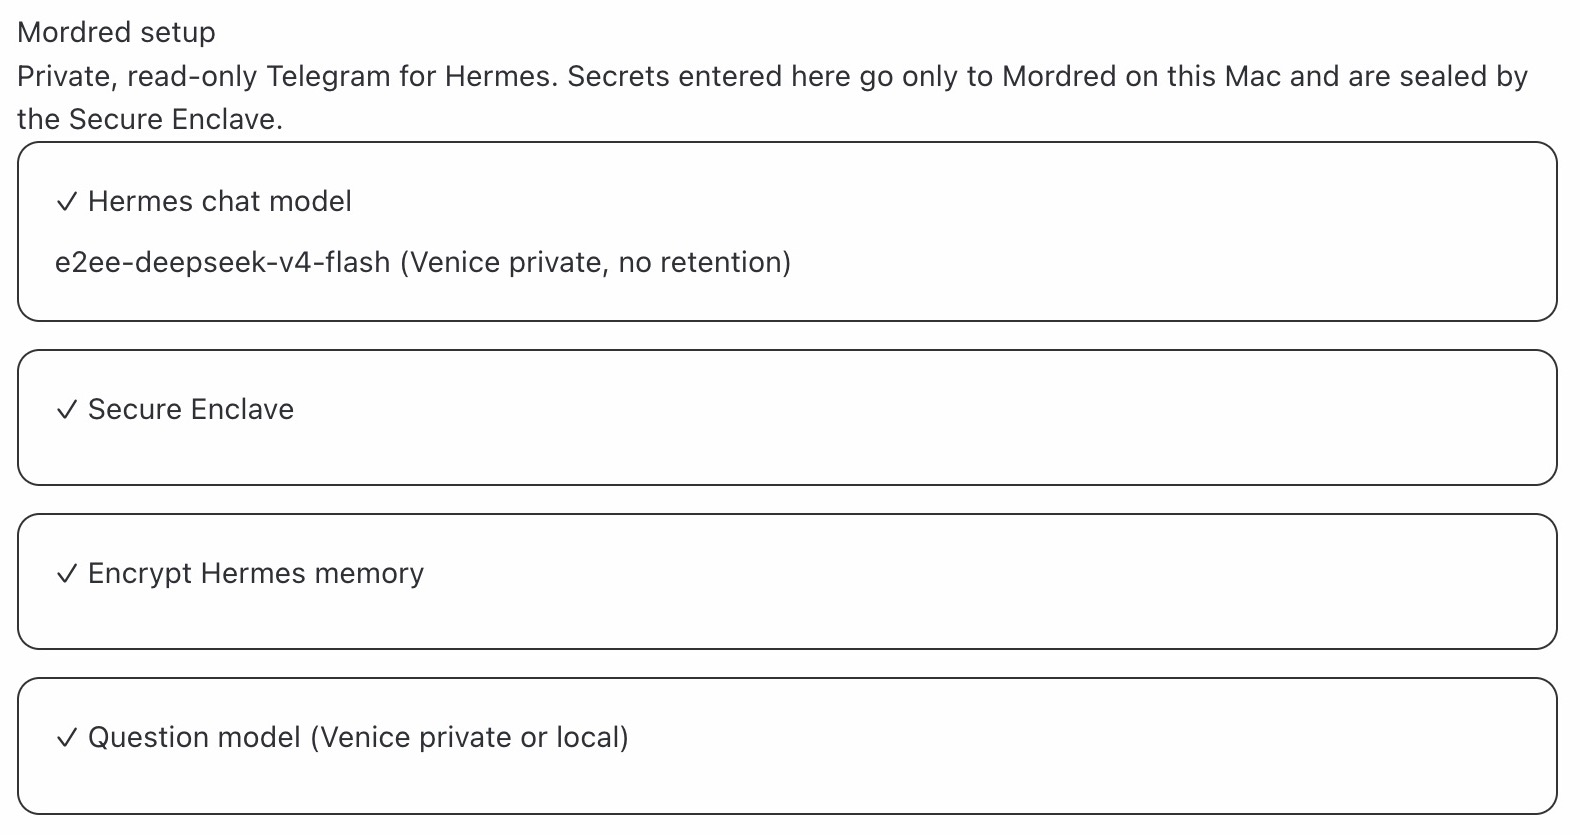
Telegram settings appear further down in the Mordred screen. Leave them for the next step. Finish the encryption settings above, then follow step 6 to set up Telegram.
Continue to step 6: Set up TelegramImport Telegram
Enter your Telegram login code and password only in Mordred → Connect Telegram, never in the Hermes chat.
How are your Telegram login and messages protected?
This connects Mordred to your Telegram account, much like signing in on another device. Telegram requires a login code and, if you enabled two-step verification, your Telegram password.
- The Connect Telegram form uses your login code and password to authenticate with Telegram without sending them to the AI model or adding them to your chat history.
- Mordred does not save or log your login code or password. It saves an encrypted session on your Mac to stay connected, protected by your Mac’s Secure Enclave.
- Mordred’s importer reads messages and blocks sending, editing, or deleting them. This restriction is enforced by Mordred; Telegram grants a full account session, not a read-only login.
- Imported messages are encrypted on your Mac. When you ask questions about them, relevant message text is processed by your selected Venice model or local model.
You can revoke this connection from your Telegram app: Settings → Devices (or Privacy and Security → Active Sessions). Select the session created for Mordred and terminate it.
Telegram’s guide to managing sessions- my.telegram.org/apps → “API development tools” → create an app
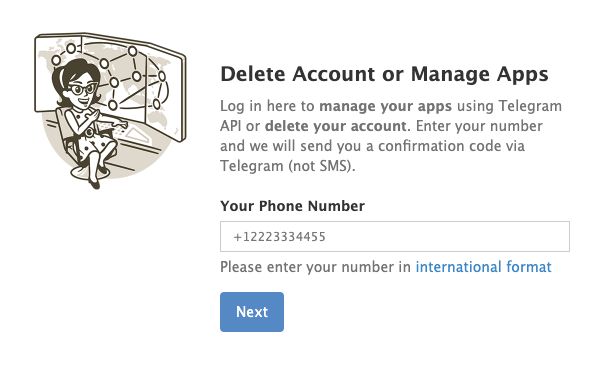
Sign in to Telegram's app management page
Open full size- Enter your phone number in international format and click Next. The confirmation code arrives in Telegram, not by SMS.
- After signing in, open API development tools and create an app. Copy its api_id and api_hash for the next step.
Input example · illustration, not a screenshot Telegram app creation: example values - App title
- Mordred Demo
- Short name
- mordreddemo
- Platform
- Desktop
- Description
- Personal Telegram import with Mordred
In API development tools, use your own app name and an available short name, select Desktop, complete the form, and click Create application. If you already have an app, use its api_id and api_hash.
- Return to Hermes and paste
api_idapi_hashinto Connect TelegramReturn to Hermes and enter your Telegram app credentials
Open full size- Return to the Mordred page in Hermes and find Connect Telegram.
- Paste the api_id and api_hash from the app you just created into their matching fields.
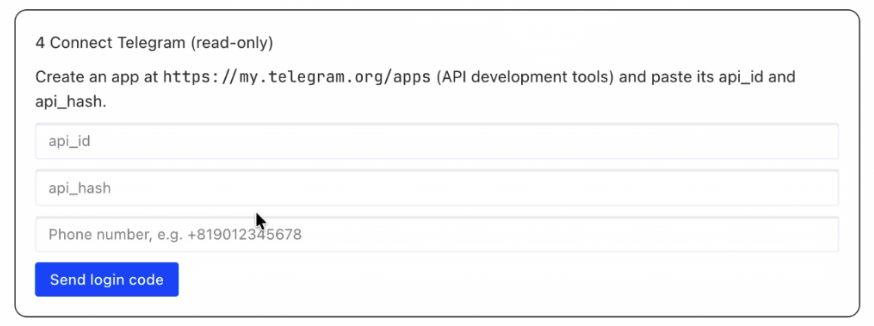
- Phone number Login code Password (only with 2-step verification)
Input example · illustration, not a screenshot Enter the login code in Hermes Enter your phone number in international format in the form above and click Send login code. Enter the new code in Telegram login code and click Continue; the earlier my.telegram.org code is separate.
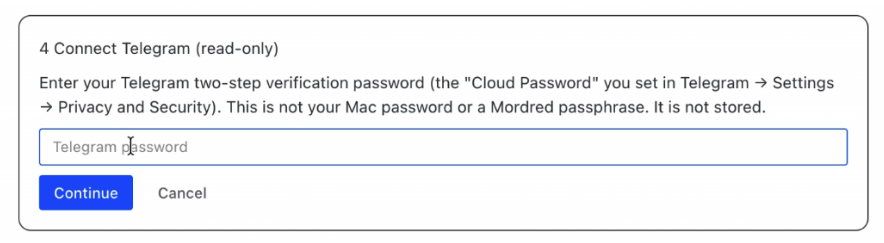
Telegram login code
Code received in TelegramContinueSign in to Telegram inside Hermes
Open full size- If you have enabled Telegram two-step verification, enter that password and click Continue. This is your Telegram password, not your Mac password or Mordred passphrase.
- The screenshot shows the password step. If two-step verification is not enabled, no password is required.
- Import — press it
Choose how many days to import
Open full size- Once Connect Telegram has a checkmark, find Import messages below it.
- Leave Last set to 3 days for this guide, then click Import and wait for it to finish before asking questions.
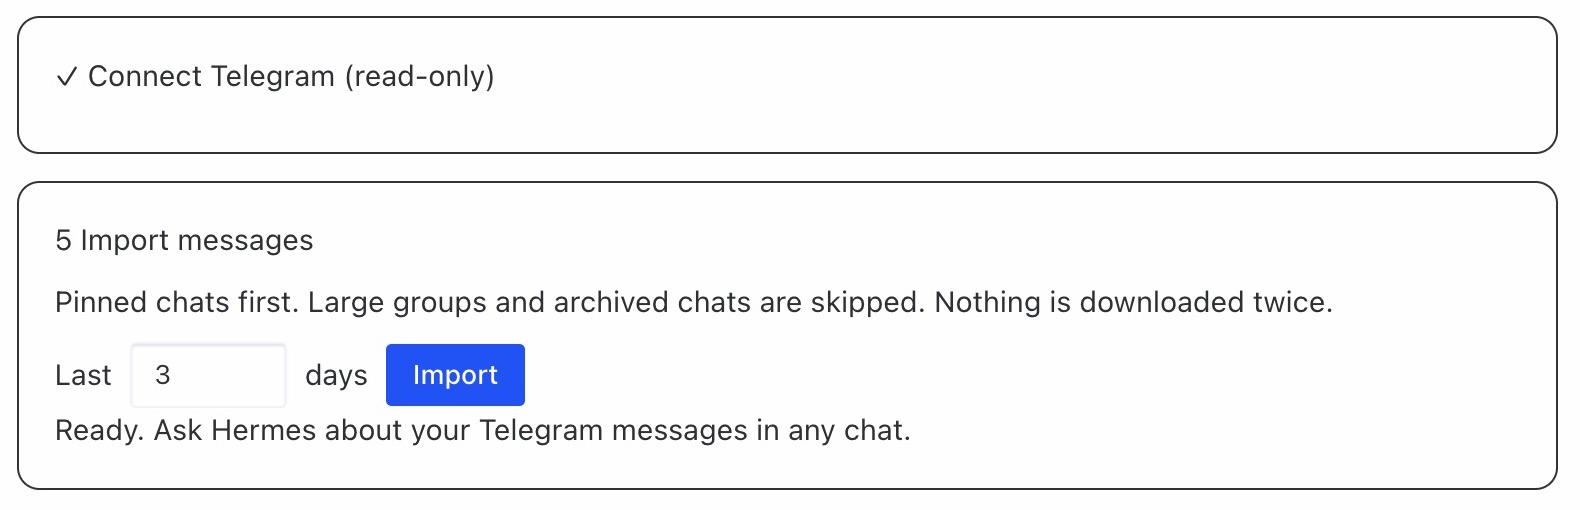
Imported
- Last 3 days (adjustable)
- Pinned chats first
Not imported with these settings
- Archived chats
- Groups with over 100 members (default)
The CLI can include archived chats and large groups. Secret chats cannot be imported; media files are not downloaded. Import options
Now just ask.
Open a new Hermes chat and ask about the messages you imported. Approve Touch ID if prompted.
From my Telegram conversations over the last 3 days, list anything I still need to do.
For newer messages, return to Mordred → Import messages and click Import again. Adjust Last to change the time range; existing messages are not downloaded twice.
Everything stays private